Transferring Python Packages
1. Introduction
Have you ever needed to transfer isolated Python environments from one machine to another but were unsure of the best way to do it? Fret not, stranger—I have you covered!

If you are unfamiliar with Python environments, they are basically a self-contained directory that has its own python binary, along with other python packages. This means that if you accidentally install a conflicting package in that Python environment, you can simply delete the entire folder and start again, hassle-free. If you were to face conflicting python packages on the base environment, things could get extremely messy.
I would highly recommend using miniconda for managing python environments. I have been a long-term user of miniconda and it beats the venv python environment manager when it comes to the transference of packages from one machine to another.
This guide will show you how to:
- Install miniconda
- Create python environments with the
condacommand - Install python packages into the environment
- Transfer python environments with the
condacommand
- Before we proceed, is is also important to know the target machine’s processor architecture and OS version.
- Sections 2 to 5.1 have to be done on a similar machine to the target machine.
- If the preperation machine is too different from the target machine, the transfer will fail!
2. Installing Miniconda
2.1 Windows
PS C:\Users\gerald> curl https://repo.anaconda.com/miniconda/Miniconda3-latest-Windows-x86_64.exe -o miniconda.exe
PS C:\Users\gerald> Start-Process -FilePath ".\miniconda.exe" -ArgumentList "/S" -Wait
PS C:\Users\gerald> del miniconda.exe
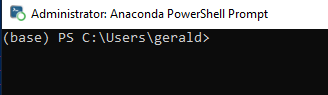
After installation, open the “Anaconda Powershell Prompt (miniconda3)”.
2.2 Linux
gerald@nexus:~$ mkdir -p ~/miniconda3
gerald@nexus:~$ wget https://repo.anaconda.com/miniconda/Miniconda3-latest-Linux-x86_64.sh -O ~/miniconda3/miniconda.sh
gerald@nexus:~$ bash ~/miniconda3/miniconda.sh -b -u -p ~/miniconda3
gerald@nexus:~$ rm ~/miniconda3/miniconda.sh
After installing, close and reopen your terminal application or refresh it by running the following command:
gerald@nexus:~$ source ~/miniconda3/bin/activate
To initialize conda on all available shells, run the following command:
gerald@nexus:~$ conda init --all
3. Creating Python Environments with Conda
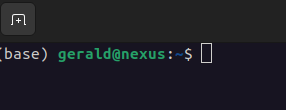
Once you have a working setup, you should be able to see that there is a (base) environment in your terminal.
The two figures below are for Windows and Linux, respectively.
To create a new environment with basic python packages, do the following command:
(base) gerald@nexus:~$ conda create -n $ENVIRONMENT_NAME python=$PYTHON_VERSION
4. Install Python Packages in Environment
The following example assumes that I have created an environment called test-env. Do note that the Linux and Windows conda syntax is exactly the same.
-
Activate the environment
(base) gerald@nexus:~$ conda activate test-env -
IMPORTANT - Install conda-pack
(test-env) gerald@nexus:~$ conda install conda-pack -
Install whichever python package you need with pip3
(test-env) gerald@nexus:~$ pip3 install $PYTHON_PACKAGE
5. Transferring Python Environments with Conda
5.1 Packing the Environment
While the environment is still activated, run the following command to archive this environment:
(test-env) gerald@nexus:~$ conda-pack
On success, this should give you a .tar.gz archive of the environment.
5.2 Unpacking Environment on Target Machine
user@target:~$ mkdir test-env
user@target:~$ tar -xzf test-env.tar.gz -C test-env
user@target:~$ source test-env/bin/activate
(test-env) user@target:~$ conda-unpack
If everything has been done properly up to this stage, you will have a working python environment with all your packages in your target machine.
6. Conclusion
I have been using this workaround for quite some time now and while doing this write-up, I realized that conda has a new feature where you can specify the target platform when creating a new environment. The example shown in their official documentation is as follows:
$ conda create --platform osx-64 --name python-x64 python
I have yet to test this new feature out. Perhaps I will do a follow-up post soon to explore this new workflow. Adios for now!